

What is Time Lapse?
Time lapse image takes multiple pictures, taken over a period of time, and combines them, either by blending them to form one composite image or by making them into an animated video.
Why Try Time Lapse?
Time lapse videos can show us the world in a special way. The camera can sit still in a way that people cant, meaning that you can take an interesting events that unfold over a long period of time and condense it down to seconds, or even a single image. Time lapse was first used by Arthur C Pillsbury in 1912, to show the movement of flowers.
This may sound similar to long exposure photography, but the key difference here is taking exposures where time lapses, so there’s a gap between discrete exposures. Time is condensed so that some information is skipped.
To do time lapse as photography, you combine multiple exposures to a single photograph. Think of things like
the moon during an eclipse, planes coming to land at an airport over
the course of a day, or the changes of light from morning to night. I have more examples below.


What You Need
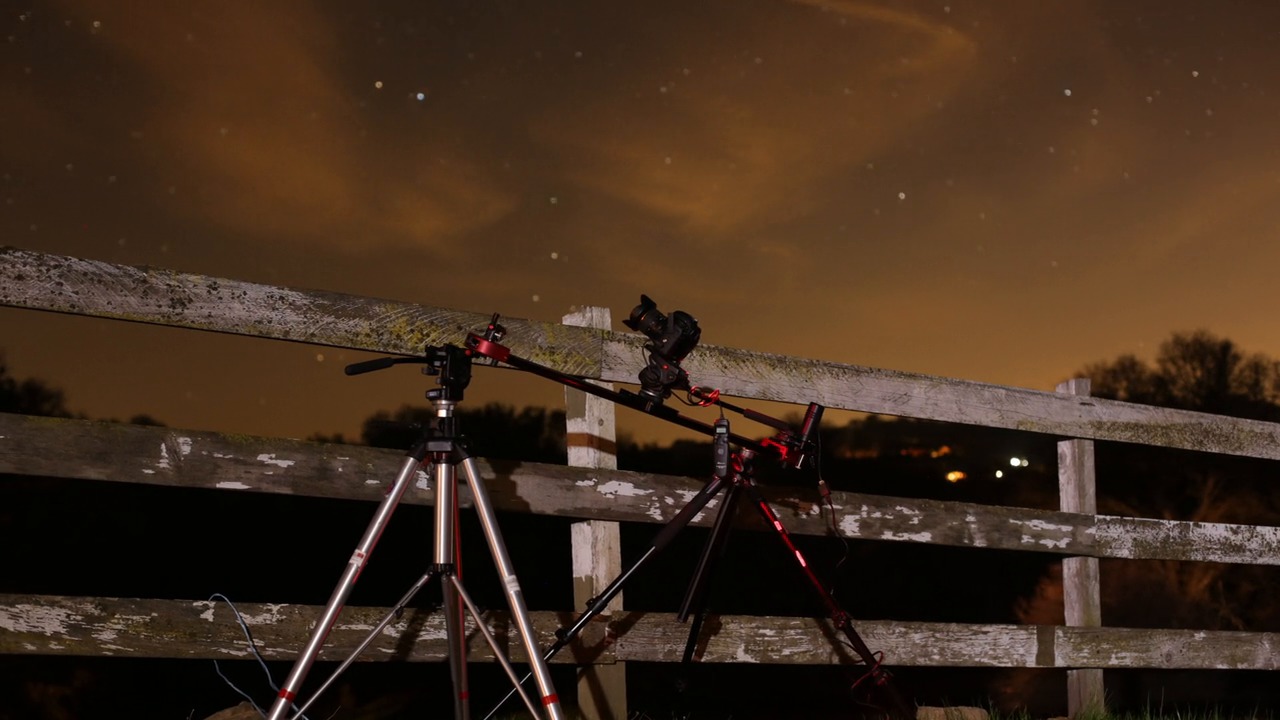
Tripod
I’m pretty fast and loose with tripods; but for time lapse, they’re essential.
Have a tripod which is rock-solid. In my experience, tripods built for video cameras tend to be the most sturdy because video cameras are often much bigger and heavier. They’re usually more expensive, unfortunately, and can be pretty cumbersome to carry around.
A regular tripod built for DSLRs should be fine but look for strong legs that lock into place securely. You may also want the tripod to have a hook to hang your bag or other weight, to keep it down. I’m not so keen on that personally, as I think any momentum to the weight could help to knock the tripod over. Another approach is to stake your tripod to the ground with an elastic cord. Anthony James' recommendations for night photography tripods are equally applicable to time lapse.
Having a tripod that folds up into a decent size and isn’t too heavy will make it easier to cart around. It’s a delicate balance between this, and something steady that you can rely on.


Remote Trigger and Intervalometer
You really don’t want to have to sit with your camera for hours, triggering the shutter at selected periods of time. Not only is that impractical, but you’ll most likely move the tripod slightly by touching it each time.
A remote trigger (with timer) or intervalometer lets you take a sequence of photographs, automatically, at selected periods of time. Bear in mind that not all remote triggers or DSLRs have this function built in though, so best to check.

 Trigger Time: Intervalometer Basics for Time-Lapse and Long Exposures

 Time-lapse and Long Exposure Control With Your Smartphone


ND Filters
You might wonder why you’d necessarily need to block out some light while doing time lapse. There’s a technique called ‘shutter dragging’ that time lapse photographers like to utilise. I’ll go into this a little later.
Patience
You’re going to do a lot of waiting around when you’re making a time lapse. If you’re anything like me, then you won’t want to leave your camera unattended, outside, so you could be out in the elements for some time. You’ll require patience and the appropriate clothing for the climate.
Inspiration
Moon Eclipse Over City


The foreground lacks interest here but that’s not necessarily a bad thing considering the focus is on the moon. There’ll only be so many places and angles that you’ll be able to capture something like this, and it might be tricky to work out beforehand, so a lot may be down to luck.
Fireworks in Denver


At first glance, I might think ‘long exposure’ with this image, but aside from the light trails at the bottom, the fireworks appear too sharp for it to be a long exposure. More likely, it’s a composite with the bottom being a long exposure and the fireworks being a series of single shots, taken over time and blended.
Candle Burning


Displaying time lapse in a series of photographs is a nice approach, and it also means you’re in a better position to adjust your settings during the shoot, as moving the camera isn’t so critical.
Purple Hyacinth


Similar to our candle example above, but merged into one photograph rather than separate shots, this hyacinth plant growing was obviously taken over a much longer period of time. Lots of patience required!
Minneapolis Skyline Sunset to Twilight


I’ve seen a similar method to this but displayed in vertical sections across one image. You could argue that this would only really take two images – one at night and one during the day, but you’d have to get the location and camera position spot on to be able to edit that seamlessly.
Add Movement to Your Timelapse
This video is great, as it demonstrates a time lapse, of a time lapse! The photographer used a mechanised slider between two tripods, and captured the smooth movement of the time lapse they're shooting.
It means that as well as the movement of the event you're photographing, you can add in some movement within the frame to keep the interest going and stop it from being a little repetitive.
Technique
Planning
Good planning is pretty essential for time lapse. If the time lapse is outside then your camera is going to be exposed to the elements for some time. Will it rain? Will it be windy? Check your local forecast as best you can and prepare for the worst, just in case.

 5 Windows Phone Apps for Outdoor Photographers


 15 Essential Apps for Every Photographer's Smartphone
Shutter Dragging for Smoothness
Because you need to blend a lot of frames to create a moving sequence, then using a slower shutter speed (this is where the ND filter mentioned earlier comes in – you’ll need it for shooting a bright scene) and using the motion blur to create an illusion of a smoother looking time lapse. How long to leave the shutter open will depend on how much motion is in the frame.
You can also help with smoothness by taking more images over your event. The more you have, the smoother it will be.

 How to Make a Long Exposure High Dynamic Range (HDR) Photo

 Bramping: Making Advanced Time-Lapse With TriggerTrap
Appropriate Framing
A time lapse in itself can be fascinating, but still approach it the way you would with a good photograph. Have some interesting foreground and make sure the thing you’re making the time lapse of is worthy. If it’s unlikely to wow your audience but you still want to capture and share it; consider making it shorter.
Nailing Focus
Much like setting up a long exposure, you’ll need to manually set your focus—most likely to infinity if you’re shooting landscapes. Remember to set your focus before you put on your filter (if you’re using one); it can be hard, or even impossible, to see through the dark glass of a strong ND filter.
Choosing the Right Interval
How long to set the interval between shutter releases will vary. If you’re displaying movement which is already quite fast (quick moving clouds or running water) then the interval should be shorter than if you’re photographing a slow moving object, like the sun and moon or a plant.
If you’re photographing something more infrequent, like the example of planes landing at an airport, you might want to scrap the timer altogether and just manually release the shutter with your remote, when appropriate.
The second part of choosing your timings is working out how long you want to shoot. This will probably be based on what you want: if you want a time lapse video of a certain length, you can work backwards from that time to figure it out. If you want a single photograph at the end, then you should work out how many stages of your subject you want to photograph.
Some Quick Maths
You need 25 frames to create one second of video (for PAL, It’s 30 if you’re in America) so for 20 seconds of footage you’d need 500 frames. Then you times 500 by however long your ‘event’ is.
Let’s say you want to track the moon across the sky for an hour and at the end of it, you want that condensed to 30 seconds. You’d multiply 30 by 25 (frames) which is 750 pictures you need to take over the course of that hour in order to get 30 seconds worth of footage. I know, my head hurts too.
If you don’t know how long your ‘event’ will last, then choose infinity or the equivalent on your remote, and wait!
Processing
Essentially, any software that will process video will let you create a time lapse. The thing that you really need to consider is if and how you’ll edit your images.
One way would be to create a Photoshp action that you can apply to all your images, but be aware: if light changes (think sunsets) then your action may look completely different on a still half way through your set than it did at the start.
Another, and perhaps more practical way would be to create your video first and then edit that, so you’re working with one file rather than, potentially, hundreds.
Either way, Kevin Gater's course goes into full detail on post-processing. Check out Time Lapse Video for Photographers.


Potential Problems
Light Changes
Above, I mentioned about potential light changes in your images, and that’s something you need to be aware of while creating your time lapse, too.
It’s best to manually expose in a way that’s the best fit for the whole event. The only time that’s really going to cause issue is during light changing events, again, like a sunrise or sunset.
If you really must make changes during your shoot, then remember that any major ones may look obvious and ‘jumpy’ in your final time lapse. Try to make only minor adjustments in increments, and do those via your remote or a camera link to an app—if you touch your camera to make adjustments, chances are you’ll move it.
Storage
If you’re shooting hundreds of photographs then you might want to think about storage space, both on your SD/CF card and then on your computer when you come to edit it down.
If you usually shoot RAW and you have a particularly high megapixel camera, the sizes can become insurmountable for this many images, so you may want to bump the file type down to a JPEG to save space and loading time.


Top Tips to Time Lapse
- Invest in a sturdy tripod
- Use an Intervalometer
- Plan careful and check the forecast
- Use ‘shutter dragging’ to create smoother looking motion
- Think about shooting in JPEG rather than RAW, to save on space
Further Resources
- Build a DIY Rotating Time Lapse Tripod Head: How to quickly and easily create your own rotating time lapse head for your GoPro or compact camera using a kitchen timer
- Bramping: Making Advanced Time-Lapse With TriggerTrap: Learn about special kinds of time-lapses you can do with TriggerTrap and your smartphone: a bramping time-lapse.
- Time-Lapse Video for Photographers: You'll have the chance to walk through a time lapse shoot from start to finish, helping that daunting feeling melt away.
Final Thoughts
Time lapse is great fun, an important way to document something we couldn’t get in just one photograph. It's also a nice stepping stone into video if you’re a photographer.
Although there are some things you’ll need to time lapse, like a tripod and an intervalometer, pretty much anything that takes a picture will be capable of creating a time lapse.
Make sure your tripod is sturdy. I have a rather funny video of my partner’s camera falling to the ground after his tripod blew over in a strong wind. The camera was fine, but it could have been a very expensive lesson—more expensive than a decent tripod would’ve been!
Get an ND filter if you want to time lapse during the day and use that to take longer exposures, a technique known as ‘shutter dragging’, to get a smoother final video.
Plan, plan and plan some more. Chances are, you’re going to be waiting around for long periods of time to get the ideal time lapse and you don’t want to have to repeat that time and again because you didn’t plan it out, first. Scope your location, use apps to check things like the weather and sun positions and make sure that wherever you are, you’re safe and wearing weather appropriate gear!
Manually focus and set up your shots to avoid problems like your camera adjusting for changing light. If you must make adjustments during the event, then do minor changes in increments via an app or remote, so that you’re not touching your camera in the process.
To work out how many images to take, remember that 25 frames (30 if you’re in the US) is one second of video, so work out how long you want your finished film to be and then times that by the length of your event.
Bear in mind that shooting potentially hundreds of images in RAW can take up a great deal of space, both on your memory card and hard drive. It may be wise to shoot in JPEG for projects such as this.
When you’re editing, think about whether you want to edit each image individually, which could be an enormous task, or whether you can create your video first and then work on that instead.
When you’re just starting out, it’s wise to begin with shorter events and aim for smaller video lengths, until you get used to the process. It can feel frustrating, waiting for such a long time and having to process so many images to end up with a very short video, but with practice, like in all things, you’ll improve and get the process down to a steady rhythm.
Have fun with it and try to think of new and different ways to incorporate time lapse photography into your routine.


