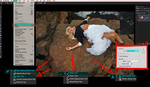
Frequency separation is a powerful way to edit portraits, but it's often misunderstood or misused. Nevertheless, when done correctly, it's a quick and effective method. This helpful video will show you exactly what frequency separation is and how to use it on your images.
Frequency separation is hotly debated in the retouching world, but I personally think it's perfectly fine when used properly. The idea is simple and arises from a mathematical concept called the Fourier Transform: intricate data such as pore texture is carried by higher frequencies, while more broad data such as color and lighting is carried by lower frequencies. If you separate the higher frequencies from the lower frequencies, you can work on one without affecting the other. This awesome tutorial from PiXimperfect will give you a bit more background on the theory and technique and will show you exactly how to use it on your own photos. Just remember that less is more and to slowly build up the effect, particularly since it's destructive (on the created layers).
And if you'd like continue learning the basics of photography, be sure to check out "Photography 101: How to Use Your Digital Camera and Edit Photos in Photoshop!"


Perfect tutorial, thanks for posting!
As a retoucher you need to zoom out sometimes and look at the over all image, I looked at this article because the thumbnail looks like plastic and hoped this result wasn't being taught... it was. The steps aren't wrong but the blur value was way too high. When he says "you want to make them look like a wax statue" you know the end result can't be good.
That is not what he said. He used the example of how to build up a wax statue to explain the different steps in succession of how they should be executed. You should play the video again and LISTEN a whee bit better. As an instructor Unmesh Dinda is one of the best you could get.
Actually that is exactly what he says at 16:15. You might listen to the video the full way through before you jump on someone. This is one of the worst retouchings I've ever seen though his explanation is very good to help someone understand FS.
Britta. That retouching looks like crap, I was trying to be nice earlier, but you clearly need to educate yourself if that is what you think is good, Perhaps have a look at this work (http://www.solsticeretouch.com/), then go have a look at that photo again...
Pretty neat explanation. Never considered using the mixer brush but will try on my next retouching.
I'm sorry, but she looks like one of the robot cast members of the show Humans. Does not look natural at all to me.
When I first started out I thought this was the be all and end all of retouching - Super easy, super quick. Unfortunately, the only thing you will get from this video is very a very bad technique and a sub par quality plastic image. I'm by no means a teacher but I feel like if you really want to learn proper techniques start off with proper clone healing / dodge & burning.
You have multiple articles with an actual retoucher (Pratik Naik) - https://fstoppers.com/profile/297/articles . Learn from this guy, not some random photoshop guru on the internet who thinks having a plastic face is acceptable.
I wish someone had taught me proper technique years earlier - please don't make the same mistake as me :(
I'm just going to put this here - http://www.solsticeretouch.com/Education
...also, google Natalia Taffarel.
Sorry if this seems harsh but I GOTTA PREACH!
Also, google Jordan Hartley.
David, totally respect your opinion, but you know Pratik even teaches FS in his tutorial you linked to? It has its place when done properly.
Yes. But I'm almost certain he doesn't blur the low layer. He most probably uses the healing brush on the hi layer.
This guy blurs the skin to oblivion.
When the only tool you have is a hammer...
The technique is solid, the application and advise on how to use it is very poor/bad educational material.
Man people argue sooo much about this technique. The man teaching this is a incredible instructor but his retouching is overkill. You would never want your image to look like that if your objective is to have a realistic looking image. I’m not a a great photographer I’ve only been doing it for a little under two years.. I’ve learned a lot and I practice all the time. I’ve learned that gaussian blur sucks for your lower frequency layer I think using noise/dust and scratches or median is a much better option. The problem with FS it’s taught soo many different ways and more often than not they teach you to make your image look like plastic. Also I would never use the mixer brush for such a massive area.. I like using it to reduce bags under eyes, scaring and it’s incredible to remove wrinkles from clothing !! I’m still learning and I’ve used FS for a year or so and I’m still constantly changing the way I do it.
Still not Fourier Transform. FT deals with isolating repeating patterns, while a high pass filter is a derivative of Sobel filtering. The Subtract method is an end-run around a full Sobel filter that uses a laplacian approach to edge detection. There is nothing related to FT in any of the FS techniques.