

Photography Gifts: Books for Every Photographer
This Holiday Season Give the Gift of Photography Education
With all of the new gear announcements made this year, its tempting to buy the photographer in your life something new and wiz bang… While new toys are great, they can get outdated and cost a lot. How about giving the photographer in your life the gift of education? The books below are a collection for photographers of any level. From leveling up technical proficiency to practice exercises to exploring the photographic journey, there is something here for everyone.
Brushing Up On Photography Skills

A
Understanding Exposure by Bryan Peterson
This is where the description of Understanding Exposure goes. This is where the description of Understanding Exposure goes. This is where the description of Understanding Exposure goes. This is where the description of Understanding Exposure goes. This is where the description of Understanding Exposure goes. This is where the description of Understanding Exposure goes. This is where the description of Understanding Exposure goes. This is where the description of Understanding Exposure goes. This is where the description of Understanding Exposure goes. This is where the description of Understanding Exposure goes. This is where the description of Understanding Exposure goes. This is where the description of Understanding Exposure goes. This is where the description of Understanding Exposure goes. This is where the description of Understanding Exposure goes.

A
Read This if You Want to Take Great Photographs By Henry Carroll
This is where the description of Great Photographs goes. This is where the description of Great Photographs goes. This is where the description of Great Photographs goes. This is where the description of Great Photographs goes. This is where the description of Great Photographs goes. This is where the description of Great Photographs goes. This is where the description of Great Photographs goes. This is where the description of Great Photographs goes. This is where the description of Great Photographs goes. This is where the description of Great Photographs goes. This is where the description of Great Photographs goes. This is where the description of Great Photographs goes. This is where the description of Great Photographs goes. This is where the description of Great Photographs goes. This is where the description of Great Photographs goes. This is where the description of Great Photographs goes. This is where the description of Great Photographs goes. This is where the description of Great Photographs goes.
A
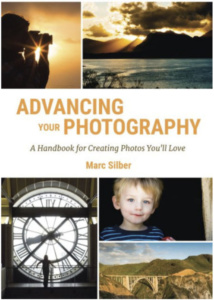
Advancing Your Photography By Marc Silber
This is where the description of Advancing Your Photography goes. This is where the description of Advancing Your Photography goes. This is where the description of Advancing Your Photography goes. This is where the description of Advancing Your Photography goes. This is where the description of Advancing Your Photography goes. This is where the description of Advancing Your Photography goes. This is where the description of Advancing Your Photography goes. This is where the description of Advancing Your Photography goes. This is where the description of Advancing Your Photography goes. This is where the description of Advancing Your Photography goes. This is where the description of Advancing Your Photography goes. This is where the description of Advancing Your Photography goes. This is where the description of Advancing Your Photography goes. This is where the description of Advancing Your Photography goes. This is where the description of Advancing Your Photography goes.
A
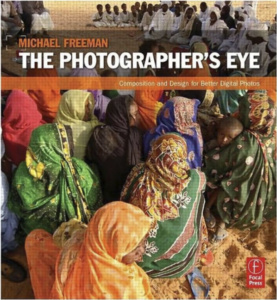
The Photographer’s Eye By Michael Freeman
This is where the description of Photographer’s Eye goes. This is where the description of Photographer’s Eye goes. This is where the description of Photographer’s Eye goes. This is where the description of Photographer’s Eye goes. This is where the description of Photographer’s Eye goes. This is where the description of Photographer’s Eye goes. This is where the description of Photographer’s Eye goes. This is where the description of Photographer’s Eye goes. This is where the description of Photographer’s Eye goes. This is where the description of Photographer’s Eye goes. This is where the description of Photographer’s Eye goes. This is where the description of Photographer’s Eye goes. This is where the description of Photographer’s Eye goes. This is where the description of Photographer’s Eye goes. This is where the description of Photographer’s Eye goes. This is where the description of Photographer’s Eye goes. This is where the description of Photographer’s Eye goes. This is where the description of Photographer’s Eye goes.
A
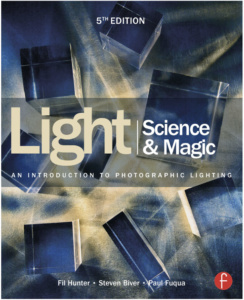
Light Science and Magic
This is where the description of Light Science goes. This is where the description of Light Science goes. This is where the description of Light Science goes. This is where the description of Light Science goes. This is where the description of Light Science goes. This is where the description of Light Science goes. This is where the description of Light Science goes. This is where the description of Light Science goes. This is where the description of Light Science goes. This is where the description of Light Science goes. This is where the description of Light Science goes. This is where the description of Light Science goes. This is where the description of Light Science goes. This is where the description of Light Science goes. This is where the description of Light Science goes. This is where the description of Light Science goes. This is where the description of Light Science goes. This is where the description of Light Science goes. This is where the description of Light Science goes.
Flexing Those Photographic Muscles
3
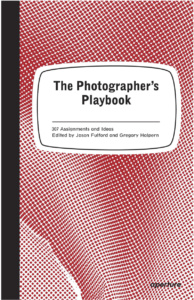
The Photographer’s Playbook
This is where the description of Photographer’s Playbook goes. This is where the description of Photographer’s Playbook goes. This is where the description of Photographer’s Playbook goes. This is where the description of Photographer’s Playbook goes. This is where the description of Photographer’s Playbook goes. This is where the description of Photographer’s Playbook goes. This is where the description of Photographer’s Playbook goes. This is where the description of Photographer’s Playbook goes. This is where the description of Photographer’s Playbook goes. This is where the description of Photographer’s Playbook goes. This is where the description of Photographer’s Playbook goes. This is where the description of Photographer’s Playbook goes. This is where the description of Photographer’s Playbook goes. This is where the description of Photographer’s Playbook goes. This is where the description of Photographer’s Playbook goes. This is where the description of Photographer’s Playbook goes.

A
Use This If You Want To Take Great Photographs By Henry Carroll
This is where the description of Great Photographs goes. This is where the description of Great Photographs goes. This is where the description of Great Photographs goes. This is where the description of Great Photographs goes. This is where the description of Great Photographs goes. This is where the description of Great Photographs goes. This is where the description of Great Photographs goes. This is where the description of Great Photographs goes. This is where the description of Great Photographs goes. This is where the description of Great Photographs goes. This is where the description of Great Photographs goes. This is where the description of Great Photographs goes. This is where the description of Great Photographs goes. This is where the description of Great Photographs goes. This is where the description of Great Photographs goes. This is where the description of Great Photographs goes. This is where the description of Great Photographs goes.
5
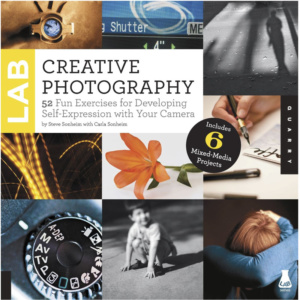
Creative Photography Lab: 52 Fun Exercises for Developing Self-Expression with your Camera
This is where the description of Photographs Lab goes. This is where the description of Photographs Lab goes. This is where the description of Photographs Lab goes. This is where the description of Photographs Lab goes. This is where the description of Photographs Lab goes. This is where the description of Photographs Lab goes. This is where the description of Photographs Lab goes. This is where the description of Photographs Lab goes. This is where the description of Photographs Lab goes. This is where the description of Photographs Lab goes. This is where the description of Photographs Lab goes. This is where the description of Photographs Lab goes. This is where the description of Photographs Lab goes. This is where the description of Photographs Lab goes.
How The Greats Approach the Journey
T
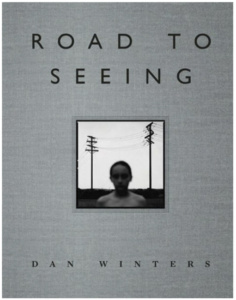
The Road to Seeing
This is where the description of Road to Seeing goes. This is where the description of Road to Seeing goes. This is where the description of Road to Seeing goes. This is where the description of Road to Seeing goes. This is where the description of Road to Seeing goes. This is where the description of Road to Seeing goes. This is where the description of Road to Seeing goes. This is where the description of Road to Seeing goes. This is where the description of Road to Seeing goes. This is where the description of Road to Seeing goes. This is where the description of Road to Seeing goes. This is where the description of Road to Seeing goes. This is where the description of Road to Seeing goes. This is where the description of Road to Seeing goes. This is where the description of Road to Seeing goes. This is where the description of Road to Seeing goes. This is where the description of Road to Seeing goes. This is where the description of Road to Seeing goes.
A
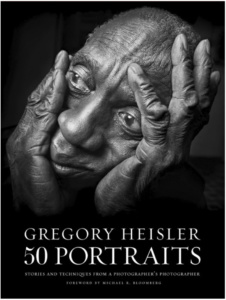
50 Portraits
This is where the description of 50 Portraits goes. This is where the description of 50 Portraits goes. This is where the description of 50 Portraits goes. This is where the description of 50 Portraits goes. This is where the description of 50 Portraits goes. This is where the description of 50 Portraits goes. This is where the description of 50 Portraits goes. This is where the description of 50 Portraits goes. This is where the description of 50 Portraits goes. This is where the description of 50 Portraits goes. This is where the description of 50 Portraits goes. This is where the description of 50 Portraits goes. This is where the description of 50 Portraits goes. This is where the description of 50 Portraits goes. This is where the description of 50 Portraits goes. This is where the description of 50 Portraits goes. This is where the description of 50 Portraits goes. This is where the description of 50 Portraits goes. This is where the description of 50 Portraits goes. This is where the description of 50 Portraits goes.


